
Reference Points
This worksheet is for planning purposes only and provides the ability to maintain predefined Initial points, Battle positions, Contact Points, Holding areas and targets. The user can create the points or import previously exported points to the Reference Points panel to be used via the Strike Instructor Control panel, Routing Instructions panel, Aircraft Check-In panel or New Strike Serial panel of Strike Schedule worksheet. The user has the ability to delete and rename previously recorded points.
To view this window: Records ->Reference Points
Features of this panel are:
- Show data about Reference Points, Reference Type, Description, Grid Type, Grid Location
- Allow user to enter data to the record
- Print the record data
- Import compatible data from Microsoft Excel (.xls/.xlsx) worksheets
- Export the Reference Point to a Microsoft Excel (.xls/.xlsx) file
- Add Row to insert new Reference Point by defining the Reference Points, Reference Type, Description, Grid Type, and Grid Location
- Clear Records will clear the entries from Reference Point panel. The entries will be removed from Strike Instructor Control panel only if you click “Clear Saved Points”
- Delete Selection allow multiple entries to be deleted. To apply the changes and to proceed with the remaining entries, click “Save’ button.
- When the Save button is selected the current entries will be available to be used via the Strike Instructor Control panel / Routing Instructions.
- Load button will reload the entries that were previously saved, which have been cleared via ‘Clear Records / Delete Selection’ buttons.
- Clear Saved Points will remove the saved points from the memory and thereby these points will not be available within the VBS3Strike Instructor Control panel/Routing Instructions.
- To rename an Reference Point, click the ‘Reference Points’ column for that target entry, rename the ‘Reference Point’ and then click the ‘Save’ button.
- The check box column allows a record to be selected, to draw a marker in the appropriate grid in VBS3 and also delete by clicking the "Delete Selection" button. ;
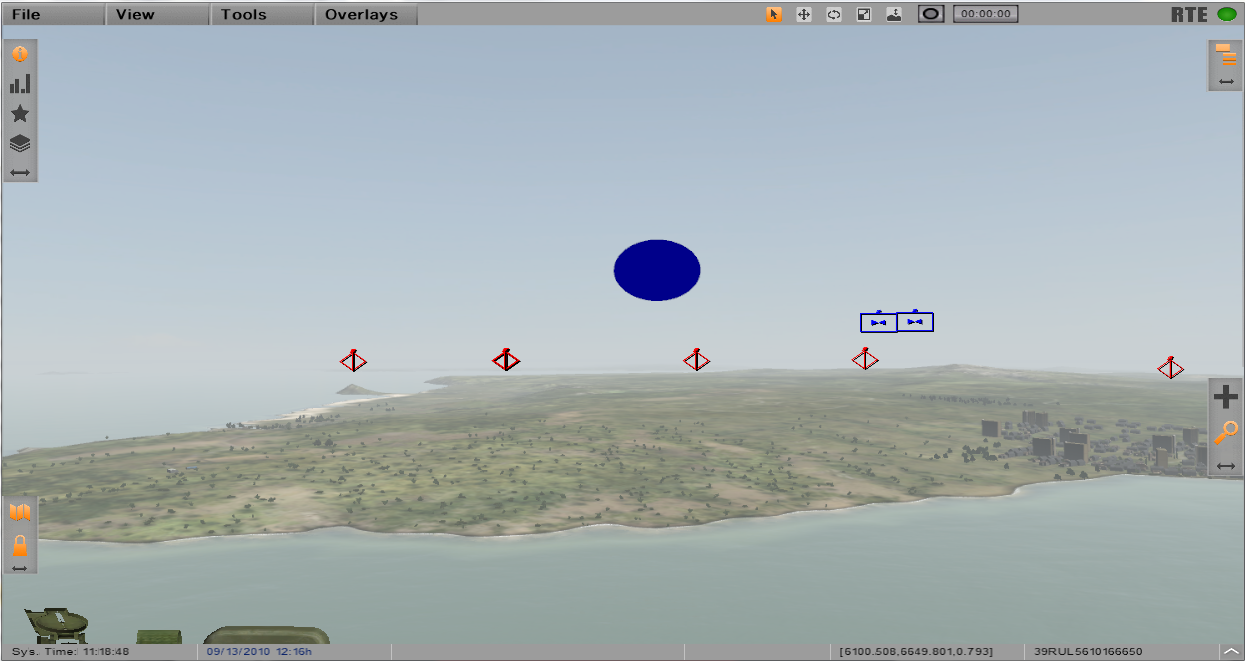
- All the created Reference point records will be drawn in to the VBS3 2D map and in 3D view as well, as shown in image 9b.2 and 9b.3, 9b.4, 9b.5 and 9b.6. The draw hide check box in the reference points panel allows the user to turn on/off the rendering of the recorded positions
Note:
Hiding a recorded reference point doesn't hide the marker and the name given for the reference point. It will hide only the reference point boundary (BP, HP, and CP only)
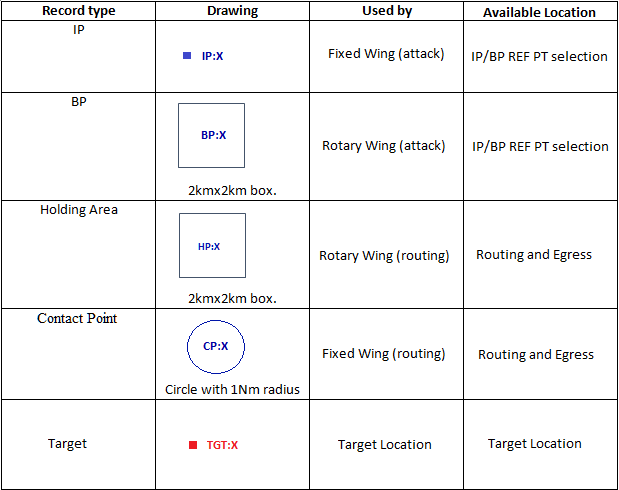
In VBS3Strike, for grid selection locations when selecting REF PT, the saved Reference points are filtered based on their type and relevance. Therefore, reference points will be loaded as follows.
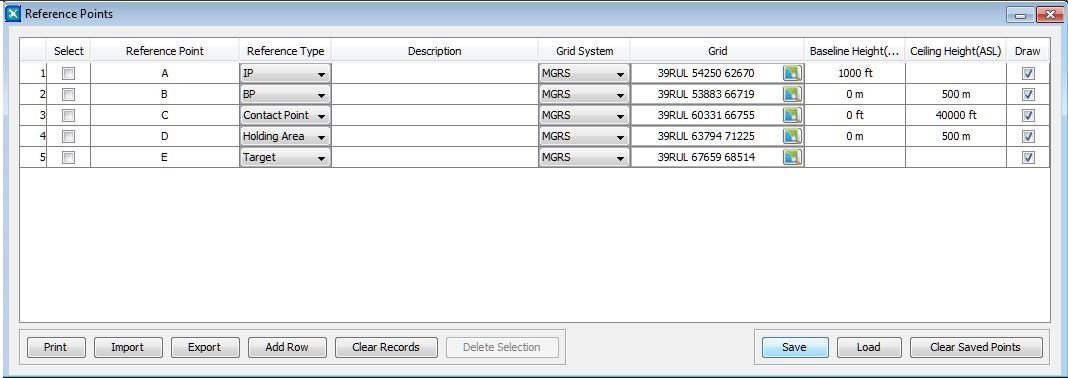
∆ Image 9b: Reference Point panel |
∆ Image 9b.1: The rendering position markers |
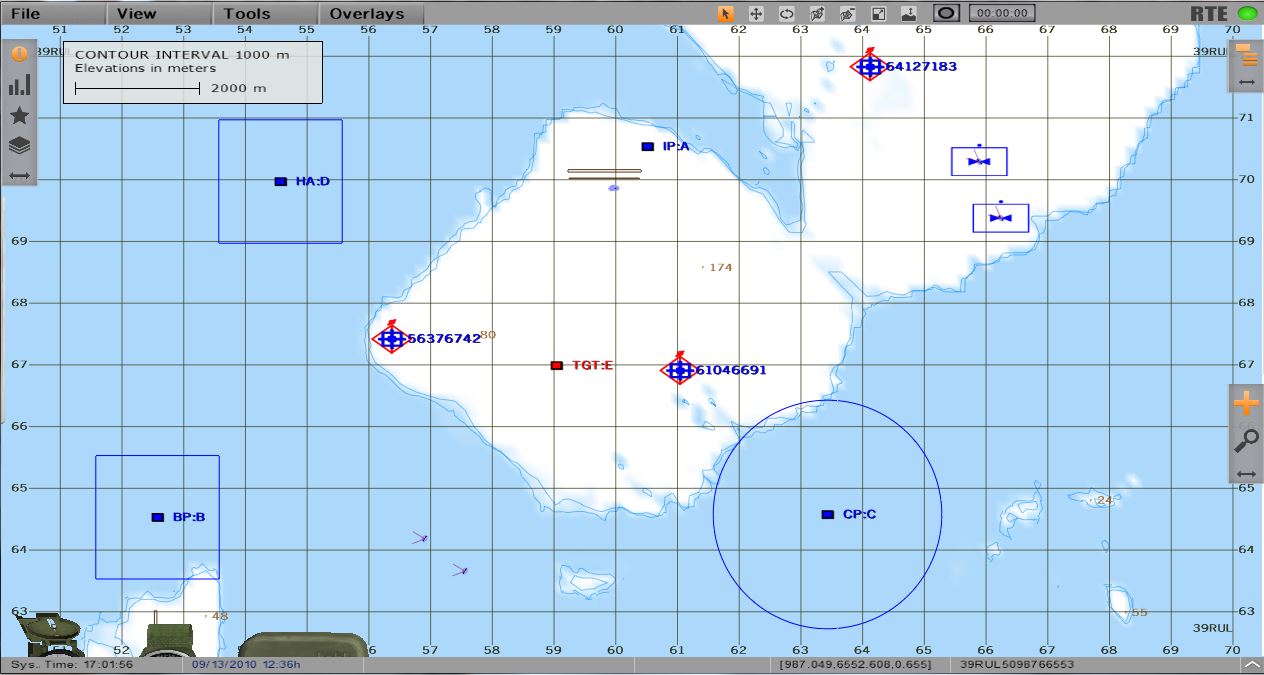
∆ Image 9b.2: A marker drawn in the VBS3 |
Renderings of the recorded positions in the 3D view are as follows.
Record type |
Default Baseline Height |
Default Ceiling height |
Drawing on the 3D view |
IP record |
1000ft |
Disabled |
A sphere created at the given baseline height filled with colour blue |
Contact Point |
0ft |
40000ft |
A cylinder with 1Nm radius and given baseline and ceiling heights, filled with colour blue |
BP |
0m |
500m |
A 2kmx2km cube with given baseline and ceiling heights, filled with blue colour |
HA |
0m |
500m |
A 2kmx2km cube with given baseline and ceiling heights, filled with blue colour |
Target |
Disabled |
Disabled |
A polygon which is rotated in 45 degrees filled with red colour |
Note:
Colors of the 2D/3D drawings cannot be changed. Heights of the IP and CP are given in feet and heights of the BP and HA are given in meters and the users can give optional values in meters or feet according to the reference point type.
∆ Image 9b.3: An IP marker drawn in VBS3 3D view |
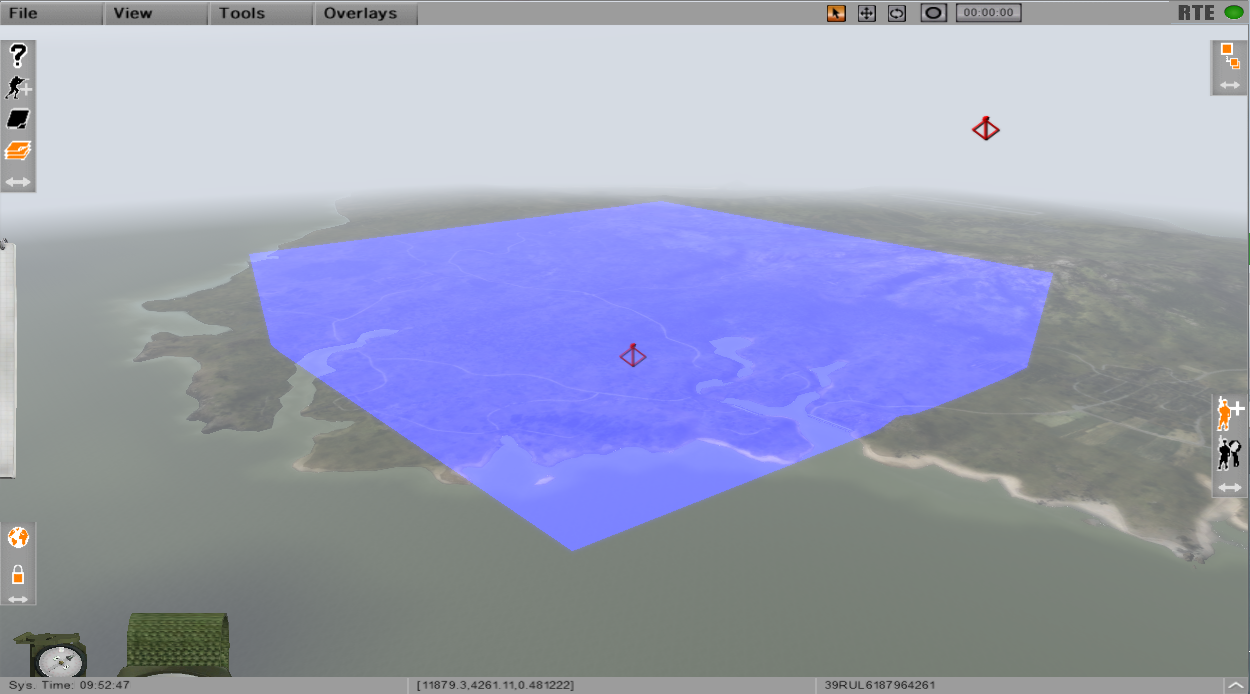
∆ Image 9b.4: A BP marker drawn in VBS3 3D view |
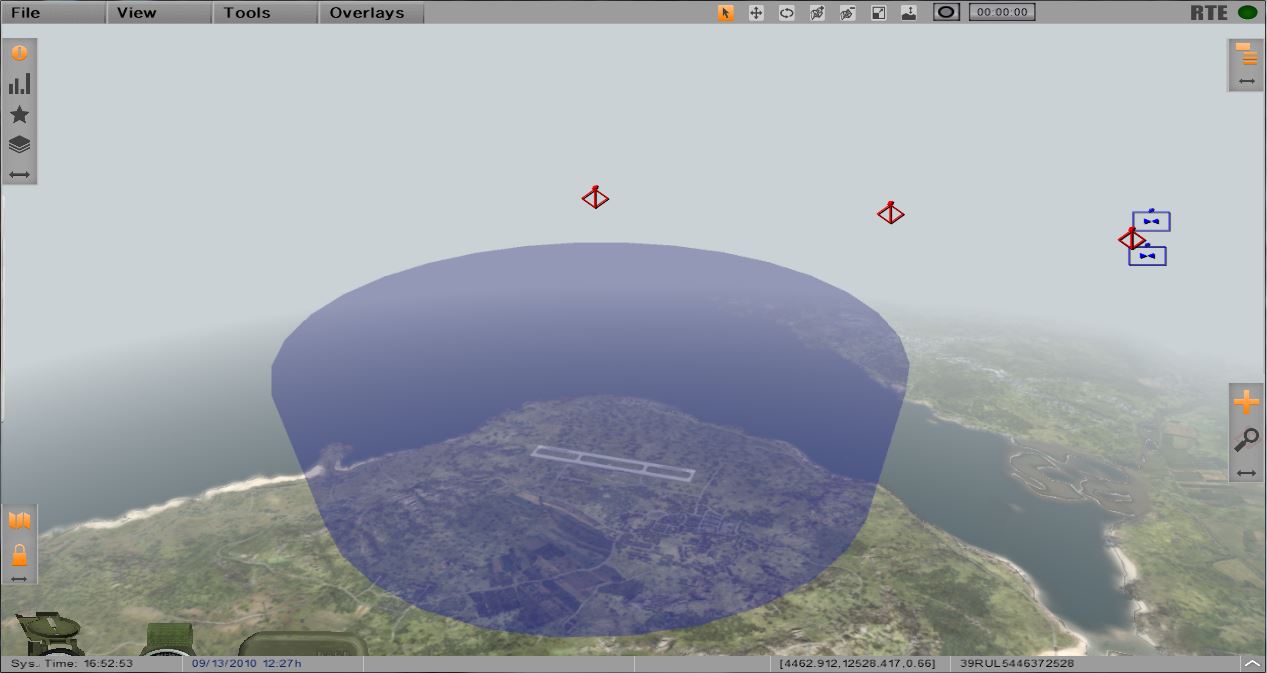
∆ Image 9b.5: A Contact Point marker drawn in VBS3 3D view |

∆ Image 9b6: A HA marker drawn in VBS3 3D view |
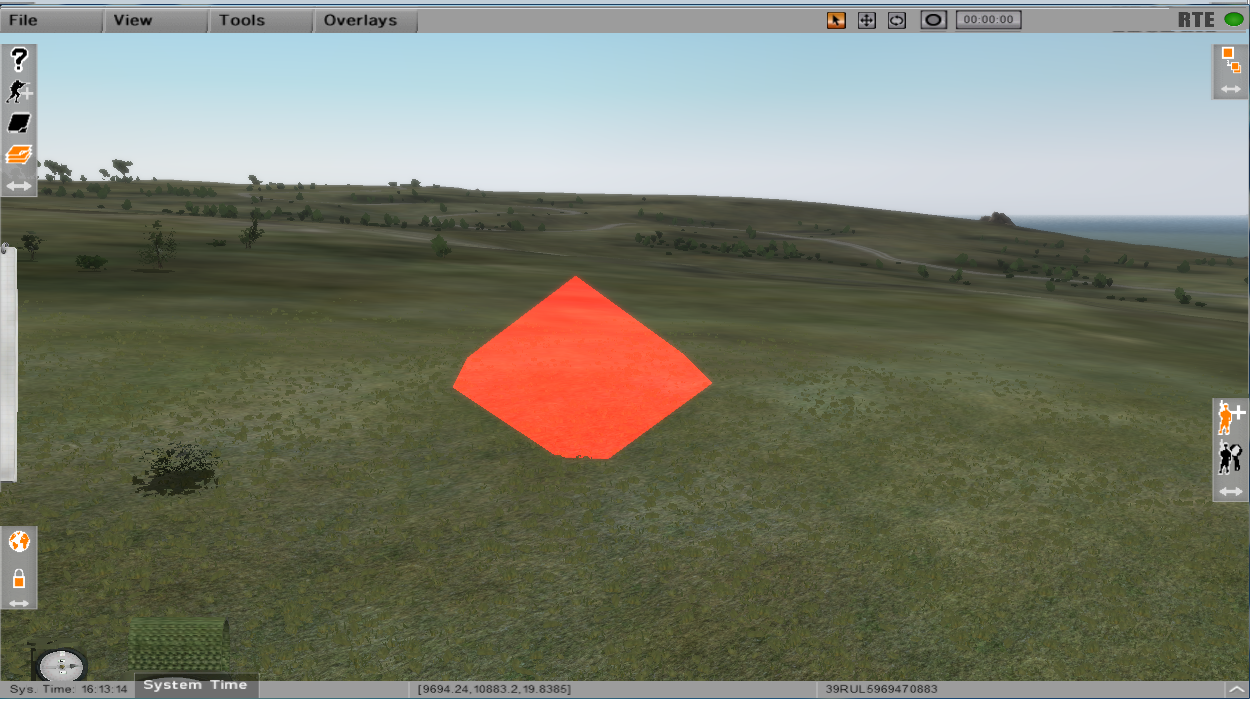
∆ Image 9b.7: A Target marker drawn in VBS3 3D view |
Once the data has been entered, click the “save” button to save the data to VBS3Strike. Any manually added rows can now be used in shift missions.
Click “export” to save the worksheet as an Excel spreadsheet and the user can now enter new data using Excel 2007/2010 or transfer to another computer using a USB stick.
Click the “import” button to import an Excel 2007/2010 spreadsheet into VBS3Strike. Click “Save” to save changes to VBS3Strike.
The check box column, allows targets to be selected and deleted by clicking the "Delete Selected" button.
The worksheet can be printed or cleared by clicking the appropriate button at the bottom of the window.
Note:
From the VBS3Strike application the 'Delete Selection' button is deleting the records only from the Reference Points window. It is not for deleting markers from VBS3. So the markers should be visible although the user have deleted them using 'Delete Selection' button. The user can delete the markers from VBS3Strike side and VBS3 side by using the button 'Clear Saved Records'.